From Business Cards to Email Signatures — A Modern Approach
Remember when business cards were a big thing? And when I say big, I mean — BIG. Even movies sometimes had a whole scene concentrated on a business card only.
No, I don’t mean it’s not a thing anymore. Rather, I suppose you can safely say that it loses a bit of the charm in the new era. Of course, it’s not the same everywhere — at least in Japan, they’re still serious about meishi. Sometimes, however, business cards became something different and unique — when they try to get away from boring pieces of paper.
Table of Contents
- Email Signature as the New Business Card
- Three Ways to Create an Email Signature
- Building a Signature Generator App
- State and Hooks
- Form Example
- Logo & Social Icons
- Signature Template (Table Layout)
- Styling & Tips
- Result
- Links
- Thoughts
Email Signature as the New Business Card
The most straightforward modern equivalent is the email signature — a simple yet effective way to give additional or even primary data about the sender, like company name, position, Skype, telephone number, and social media links.
Why use an email signature?
- Increase your professional image and business value.
- Make yourself, your brand, and your company more recognizable.
- Build trust by letting people know exactly who they’re corresponding with.
- Help the environment — no printing needed.
Three Ways to Create an Email Signature
- Directly in Gmail — using its basic visual editor (not user-friendly, time-consuming).
- Using an HTML template created by someone else (requires storage and reuse strategy).
- Build a custom web app to generate them (our choice here).
Building a Signature Generator App
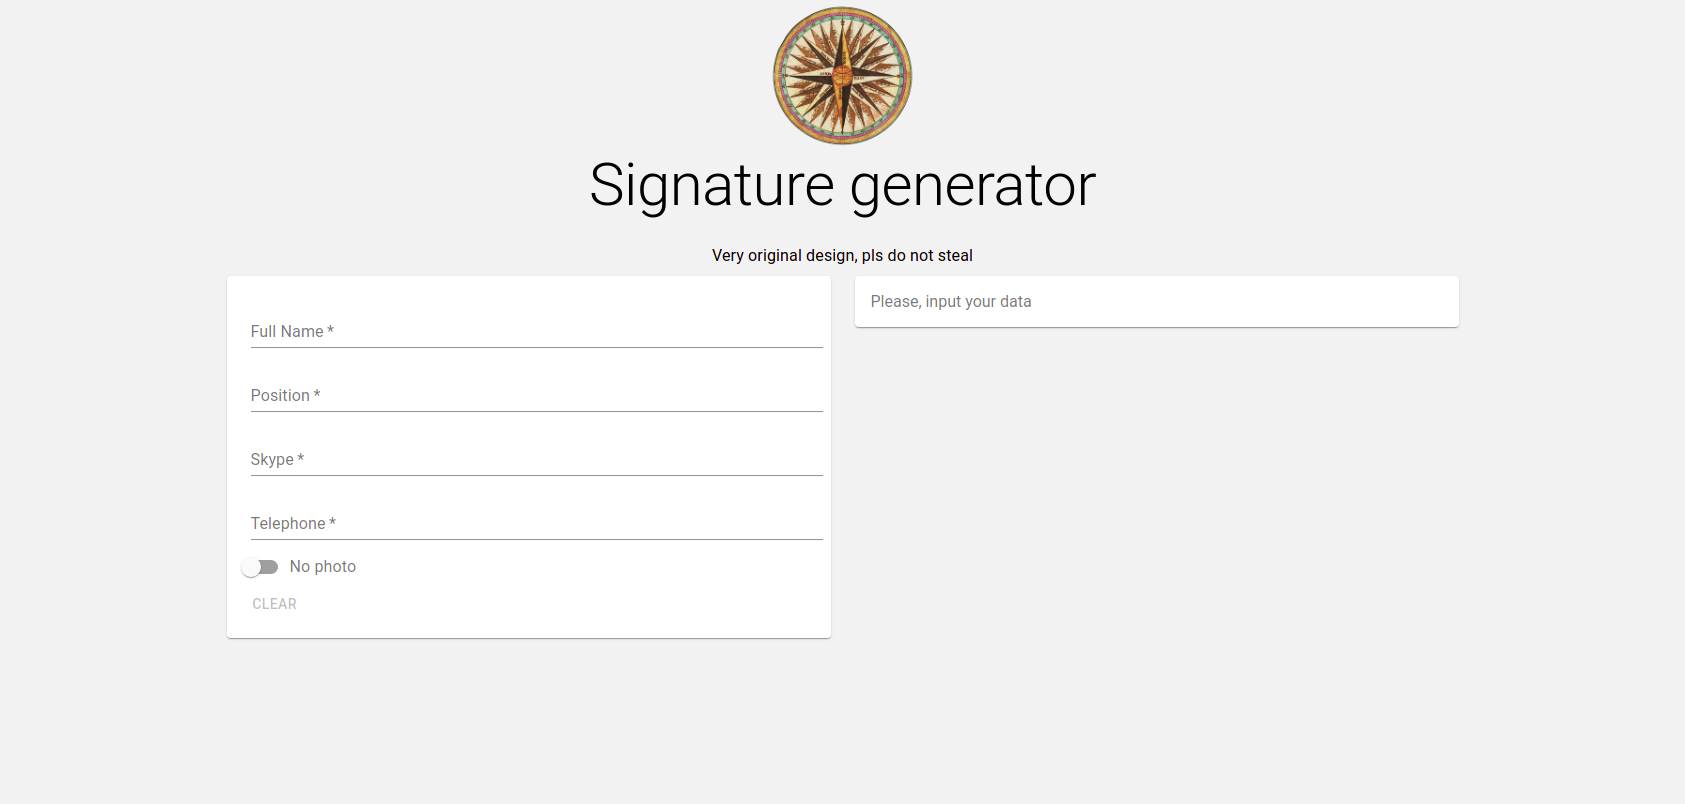
We’ll create a small internal site using React and Material UI. It will generate two types of signatures — with and without a photo — and include fields for full name, position, phone, Skype, and social media links.
Setup:
npx create-react-app signature-generator --template typescript --use-yarn
yarn add @material-ui/core @material-ui/icons
Add Roboto font in public/index.html:
<link
  rel="stylesheet"
  href="https://fonts.googleapis.com/css?family=Roboto:300,400,500,700&display=swap"
/>
State and Hooks
export interface PhotoSignatureProps {
  fullName: string;
  position: string;
  skype: string;
  phone: string;
  photo: string;
}

interface State extends PhotoSignatureProps {
  withPhoto: boolean;
  copied: boolean;
}

const initialState: State = {
  fullName: "",
  position: "",
  skype: "",
  phone: "",
  photo: "",
  withPhoto: false,
  copied: false,
};

const [state, setState] = React.useState<State>(initialState);

const handleChange = (event: React.ChangeEvent<HTMLInputElement>) => {
  if (event.target.name === "withPhoto") {
    setState((prevState) => ({
      ...prevState,
      [event.target.name]: event.target.checked,
    }));
  } else {
    setState((prevState) => ({
      ...prevState,
      [event.target.name]: event.target.value,
    }));
  }
};
Form Example
<form className={classes.root} noValidate autoComplete="off">
  <TextField
    fullWidth
    required
    label="Full Name"
    value={state.fullName}
    name="fullName"
    onChange={handleChange}
    autoFocus
  />
  <TextField
    fullWidth
    required
    label="Position"
    value={state.position}
    name="position"
    onChange={handleChange}
  />
  <TextField
    fullWidth
    required
    label="Skype"
    value={state.skype}
    name="skype"
    onChange={handleChange}
  />
  <TextField
    fullWidth
    required
    label="Telephone"
    value={state.phone}
    name="phone"
    onChange={handleChange}
  />
</form>
Logo & Social Icons
- Avoid SVGs — Gmail blocks them.
- Avoid base64 — Gmail doesn’t support it and size limits apply.
- Disable React’s auto-convert-to-base64 for small images using
IMAGE_INLINE_SIZE_LIMIT. - Host logos in
assets/folder.
Signature Template (Table Layout)
<table cellPadding={0} cellSpacing={0} className="signature">
  <tbody>
    <tr>
      <td rowSpan={5}>
        <img
          className="main-image"
          src={props.photo === "no-photo" ? Logo : props.photo}
          alt=""
        />
      </td>
      <td rowSpan={5}>
        <div className="vertical-line" />
      </td>
      <td>{props.fullName}</td>
    </tr>
    <tr>
      <td colSpan={3}>{props.position}</td>
    </tr>
    <tr>
      <td colSpan={3}>Telephone: {props.phone}</td>
    </tr>
    <tr>
      <td colSpan={3}>Skype: {props.skype}</td>
    </tr>
    <tr>
      <td colSpan={3}>
        <div className="social-logos-frame">
          <a href="https://twitter.com/">
            <img src={TwitterLogo} alt="Twitter" />
          </a>
          <a href="https://www.linkedin.com/">
            <img src={LinkedInLogo} alt="LinkedIn" />
          </a>
          <a href="https://www.facebook.com/">
            <img src={FacebookLogo} alt="Facebook" />
          </a>
          <a href="https://www.behance.net/">
            <img src={BehanceLogo} alt="Behance" />
          </a>
        </div>
      </td>
    </tr>
  </tbody>
</table>
Styling & Tips
- Use email-safe fonts.
- Hyperlinks in Gmail display in default styles — use images as links for branding.
- Test across email clients.
Result

Main app interface

Signature with company logo

Signature with photo
Links
Thoughts
- Email signatures aren’t trivial, but they’re not overly complex either.
- This is a skeleton — you can expand it with multiple templates, photo upload, custom colors, etc.
- React + Material UI makes the process quick and flexible.
Thanks for reading!