How I Created a Brain Training Game in React – The Stroop Effect Project

I started to work on this a long time ago. It was intended for my mother, but she didn’t use it much, she passed away due to COVID-19 last year. But I still hope that my work could be helpful for many people.
Let’s start by citing UN documents:
According to data from World Population Prospects: the 2019 Revision, by 2050, one in six people in the world will be over age 65 (16%), up from one in 11 in 2019 (9%). By 2050, one in four persons living in Europe and Northern America could be aged 65 or over. In 2018, for the first time in history, persons aged 65 or above outnumbered children under five years of age globally. The number of persons aged 80 years or over is projected to triple, from 143 million in 2019 to 426 million in 2050.
What does that mean for us? We must be prepared to live longer, work harder (since there would be less available manpower, so the state gonna squeeze every penny from workers to let the economy stay afloat), and witness people with mental decline more frequently. Unfortunately, the last one awaits all of us, but we still can do many, to at least stop it from progressing — healthy eating, regular exercise, and brain training. And brain training could be made in form of a game. Game web application! That’s why we’ve come here, innit?
Let’s go step by step and implement just one exercise. For now.
Table of Contents
- Game of Words and Colors
- Project Setup
- Defining the Palette
- State Management
- Generating Table Data
- Rendering the Table
- Game Logic
- Manipulating SVG Elements
- Demo Screenshots
- Wrapping Up
Game of Words and Colors

Look at the picture below.
Stroop effect
Now try to read and pronounce the COLOR of the word, not the word itself. And try to do it fast. Not so easy task, huh? What you’ve seen here is called the Stroop effect. It is mostly used in various tests and psychological research, but according to various internet sources, it could also keep your mind sharp and slow down the effects of Alzheimer’s disease. Anyway, let’s create a game out of it!
So, let’s get down to business — how we’ll do it? By adding four key points to the main idea:
- Random
- Configurability
- Challenge
- Interactive
So, it’s gonna be a playable customizable table with random words and colors, where you need to pronounce the color of the selected word, which changes over time. All others are bells and whistles. Time for code!
Project Setup
I’ll write this project in React with TypeScript and the Semantic UI React CSS framework. You’re free to use any tool, language, and framework, of course.
First of all, creating the project
npx create-react-app brain-train --template typescriptWith your permission, I’m not gonna describe every used package, since it’s gonna transform already boring text into something unreadable. You can always check the list of necessary packages at package.json in the repository. The same could be said about every module — you can see the whole code on GitHub.
Defining the Palette
This is my palette:
const Palette = [
  {
    name: "red",
    code: "#ff0000",
  },
  {
    name: "yellow",
    code: "#FFFF00",
  },
  {
    name: "green",
    code: "#00ff00",
  },
  {
    name: "blue",
    code: "#0000FF",
  },
  {
    name: "black",
    code: "#000000",
  },
];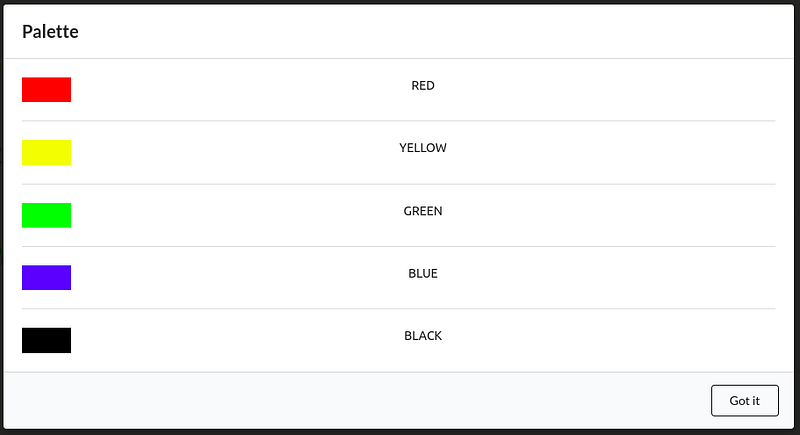
Palette modal
State Management
I built everything using hooks, so this is my “state”:
const [rowNum, setRowNum] = React._useState_(4);
const [colNum, setColNum] = React._useState_(4);
const [speed, setSpeed] = React._useState_(0.5);
const [tableData, setTableData] = React._useState_ < any > null;
const [direction, setDirection] = React._useState_("start-to-end");
const [activeCell, setActiveCell] = (React._useState_ < null) | (number > null);
const [gameStatus, setGameStatus] = React._useState_(false);
rowNum and colNum are rows and columns for the table, speed is the game speed, tableData is for randomly generated table data, the direction is for game direction, activeCell is for the currently active cell, and gameStatus is for play/stop.
Generating Table Data
This is how I generate random data for a table:
const prepareData = () => {
  let data: [number, number][][] = [];
  let word = 0;
  let color = 0;
  for (let i = 0; i < rowNum; i++) {
    let row: [number, number][] = [];
    for (let k = 0; k < colNum; k++) {
      word = Math.floor(Math.random() * Palette.length);
      color = Math.floor(Math.random() * Palette.length);
      row.push([word, color]);
    }
    data.push(row);
  }
  return data;
};
It’s a multidimensional array, which consists of rows and columns, and every cell inside consists of two numbers — one for the color name, the other for the color code.
Rendering the Table
This is how I generate and populate the table:
const generateTable = () => {
    if (tableData) {
        return tableData.map((row: [number, number][], rowIndex: number) => <Table.Row key={`tr-key-${rowIndex}`}>
            {row.map((cell: [number, number], index: number) => {
                return <Table.Cell key={`td-key-${rowIndex}-${index}`}>
                    <svg viewBox="0 0 100 20" style={{
                        width: "100%",
                        padding: "1vh 1vw",
                        fill: Palette[cell[1]].code
                    }}>
                        <text
                            x="0"
                            y="15"
                            id={`text-${rowIndex}-${index}`}
                        >
                            {t(`colors.${Palette[cell[0]].name}`).toUpperCase()}
                        </text>
                    </svg>
                </Table.Cell>
            })}
        </Table.Row>)
    }
    return null
}
...
<Table basic={"very"} size={"large"} celled={true}>
    <Table.Body>
        {generateTable()}
    </Table.Body>
</Table>
We’re just populating cells inside of columns and rows with Palette[y].name SVG text painted in Palette[x].code. Why SVG? Because it’s one of the simplest ways to fit text into the container.
Game Logic
This is the heart of that game:
React._useEffect_(() => {
  let interval: any = null;
  if (gameStatus) {
    if (activeCell === null) {
      interval = _setInterval_(() => {
        if (direction === "start-to-end") {
          setActiveCell(0);
          underlineSVG(0, true);
        } else {
          setActiveCell(rowNum * colNum - 1);
          underlineSVG(rowNum * colNum - 1, true);
        }
      }, speed * 1000);
    } else {
      const cleanUp = () => {
        setActiveCell(null);
        setGameStatus(false);
        underlineSVG(activeCell, false);
      };
      if (direction === "start-to-end") {
        if (activeCell < rowNum * colNum - 1) {
          interval = _setInterval_(() => {
            setActiveCell(activeCell + 1);
            underlineSVG(activeCell + 1, true);
            underlineSVG(activeCell, false);
          }, speed * 1000);
        } else {
          cleanUp();
        }
      } else {
        if (activeCell >= 0) {
          interval = _setInterval_(() => {
            setActiveCell(activeCell - 1);
            underlineSVG(activeCell - 1, true);
            underlineSVG(activeCell, false);
          }, speed * 1000);
        } else {
          cleanUp();
        }
      }
    }
  } else if (!gameStatus && activeCell !== null) {
    _clearInterval_(interval);
  }
  return () => _clearInterval_(interval);
}, [gameStatus, activeCell]);
It’s a timer inside a useEffect hook. If the game is active, we’re setting a new activeCell in the table, highlighting it, and removing the highlight from the previous one, going according to the direction and with a set speed.
Manipulating SVG Elements
This is how I manipulate SVG:
const underlineSVG = (address: number, highlight: boolean) => {
  let [row, col] = [0, 0];
  if (address !== 0) {
    row = Math.floor(address / colNum);
    col = address - row * colNum;
  }
  let elem: null | HTMLElement = document.getElementById(`text-${row}-${col}`);
  if (elem) {
    if (highlight) {
      elem.setAttribute("style", "text-decoration: underline");
    } else {
      elem.setAttribute("style", "");
    }
  }
};
We’re converting a one-dimensional number into a multidimensional array address and then highlighting or removing highlights from the text.
Demo Screenshots
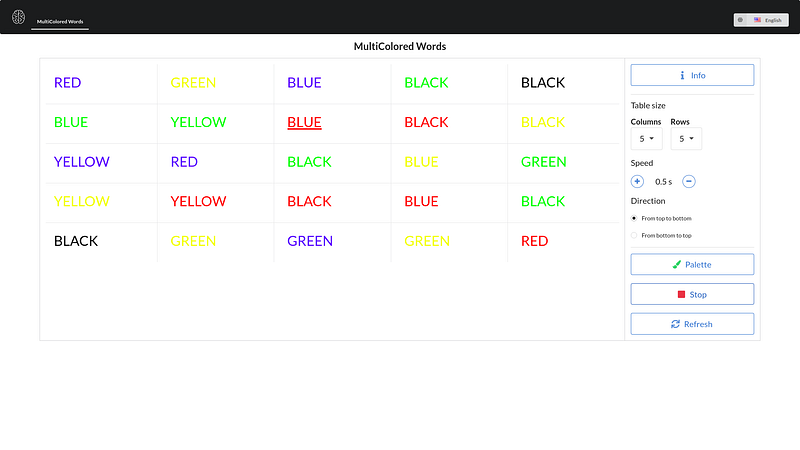
Multicolored words table in English

Multicolored words table in Russian
Wrapping Up
There is much more in my app — simple routing, informational modals, translation, etc. The full code can be found here. And the working example is here.
This is not a finished product yet, I’m going to refactor it a bit and add new games and exercises in the future. Stay with me if you wanna see it!

Well, thanks for reading!